Table Views on top of Map Views

123

Code for this tutorial is available on GitHub.

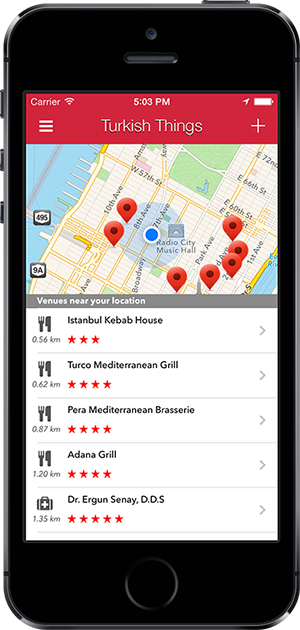
One of the features of Turkish Things is that its UIMapView plays nice with its accompanying UITableView. When you scroll the UITableView upwards, it will cover the UIMapView to give you the most screen real estate that you can have. If you scroll it down, you will see that the UIMapView will resize itself to cover the entire screen. I always wanted it to behave this way, and I was having trouble implementing it. Then my Flatiron School instructor Joe showed me how to do it. All it took was to subclass UITableView and override a few methods.

This is the idea: On our storyboard, we’ll put a UIMapView and cover it with a UITableView. Then we’ll create an edge inset on our UITableView so the cells will start after a certain space from the top. We’ll then make the background color of the UITableView transparent so that the underlying UIMapView is visible. We’ll also need to handle the taps; we’ll need to transfer the user taps and gestures that are made on the UITableView to the UIMapView.

Here is how it’s done:

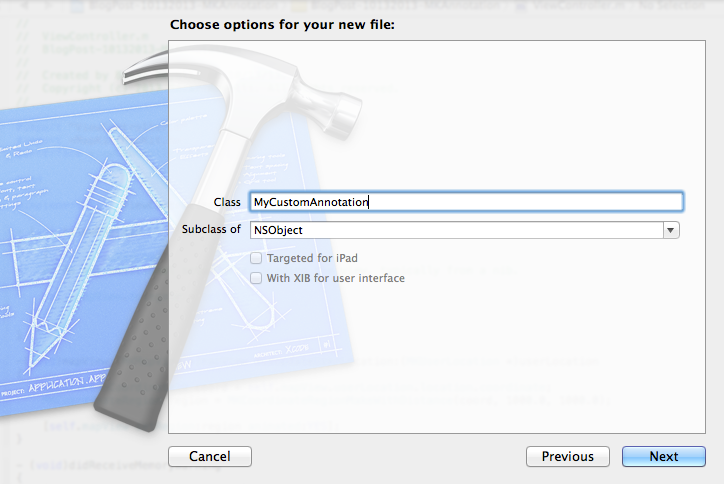
1) Subclass UITableView, and override hitTest method: The only reason we’re doing this is to handle the user taps and gestures so that the user can interact with the underlying UIMapView:

On your MYTableView.m:

- (UIView *)hitTest:(CGPoint)point withEvent:(UIEvent *)event {
    id hitView = [super hitTest:point withEvent:event];
    if (point.y<0) {
        return nil;
    }
    return hitView;
}

2) Create a UIEdgeInset so that the UITableViewCells start after a certain space:Because the UIMapView is covered with the UITableView, we need to create a space so that the UIMapView will be visible:

On your ViewController.m:

-(void)viewDidLayoutSubviews {
    [super viewDidLayoutSubviews];
    self.tableView.contentInset = UIEdgeInsetsMake(self.mapView.frame.size.height-40, 0, 0, 0);
}

3) Override scrollViewDidScroll to prevent the UITableView from scrolling down too much: We want the user to be able to pull the UITableView down no more than the height of the UIMapView (otherwise you see the white space where the UIMapView ends)

On your ViewController.m

- (void)scrollViewDidScroll:(UIScrollView *)scrollView{
    if (scrollView.contentOffset.y < self.mapView.frame.size.height*-1 ) {
        [scrollView setContentOffset:CGPointMake(scrollView.contentOffset.x, self.mapView.frame.size.height*-1)];
    }
}

4) Finally, make the UITableView background transparent: If you don’t do this, then the UITableView is not visible (it’s covered with the default white background color of the UITableView).

On your ViewController.m

- (void)viewDidLoad
{
    [super viewDidLoad];

    self.tableView.backgroundColor = [UIColor clearColor];
    self.tableView.delegate = self;
    self.tableView.dataSource = self;
}

Code for this tutorial is available on GitHub.

Posted in Uncategorized | 2 Comments

Fun with Parse’s Cloud Code

Turkish Things utilizes Parse as its backend. I heard about Parse during my iOS course at Flatiron School and thought that it was a super cool idea to get started with an app, with a really short learning curve to start sorting and retrieving data.

I have been building web and PC apps based on relational databases for years. One of the biggest challenges I had with Parse was wrapping my head around NoSQL which Parse works with. I am used to creating relationships using Foreign Keys — which you really don’t do when you’re building apps on a NoSQL database. You instead use “Relations” — where you embed pointers to related objects on other tables.

Everything starts making more sense after writing some test code to see how all this works.

One of the other challenges that this switch to NoSQL brought was the lack of “GROUP BY” queries which I heavily rely on traditional relational databases. On Turkish Things, we have venues, and each venue has multiple reviews. Each review has a star rating, and a venue has an “average rating” which is calculated by:

Average Rating for Venue: Total Ratings / Review Count.

With the lack of AVERAGE, SUM and GROUP BY commands that we use with SQL, I had to come up with an alternative solution. While it’s debatable whether or not this makes the most sense, but I decided to keep two columns on my Venues table named: ratingCount and ratingTotal to be able to calculate the average rating.

There was one problem of updating these fields. When should I increment the ratingCount and calculate a new sum for ratingTotal? Should I do that on the device, every time a new review is inserted to my database? Sounded too costly.

This is where I started learning how to hook Parse’s Cloud Code. Cloud Code is set of JavaScript functions which get triggered based on an action. In my case, I wanted a function to run every time a new review was created. 

This is what the code looks like:

Cloud Code


The algorithm first finds the “Venue” that the Venue Review is associated with. Then it increments the ratingCount by one, and then adds the new rating to the ratingTotal variable. This way I can accurately calculate the average rating for each venue on Turkish Things.

Posted in Uncategorized | 3 Comments

Turkish Things is here!

My very first App Store app, Turkish Things is now on the App Store. An early version of this app was built for a hackathon we had at the Flatiron School. I am working to catalogue authentic international Turkish venues with the app. Its data resides on Parse, and uses Foursquare API to search for venues. A day after its release, it already has around 150 venues in its database. Go check it out!

TurkishThings

Posted in Uncategorized | 1 Comment

Accessing an ASP.NET Web Site on Parallels from Mac OS X

For my upcoming Flatiron School Meet-up talk, I’ve been learning about ASP.NET MVC 4 Web Api’s. My aim is to be able to build a back end for an iOS App eventually; so I am planning to put all of the moving parts together on my MacBook.

Since I need Visual Studio to build ASP.NET Web Api’s, I purchased Parallels and installed Windows 7 as a virtual machine. Then I installed Visual Studio 2013 and started getting my hands dirty. Little did I know that I needed to take quite a few steps to be able to access my web application from Safari OS X.

Here are the steps that I followed to make all this work:

1) Disable Firewall in Windows 7: Obviously the ideal way of dealing with this would be opening ports for your web applications. But since I’m only planning to use my Parallels virtual machine for ASP.NET development, I took the risk and disabled the entire firewall. 

Firewall Settings

2) Fix Parallels Sharing Preferences Before Installing Visual Studio:  This took me the longest time. In order for IIS Express to find its configuration files, you need to make sure Parallels does not map OS X Documents folder to Windows Documents folder.

Parallels Sharing Settings

3) Update Network Adapter Settings for your Windows 7 Installation: We want OS X to be able to ping Windows 7. In order for this to work, you need to make sure both OS’s are on the same subnet. I made this work by tweaking the Parallels settings:

Screen Shot 2013-10-27 at 10.15.15 PM

4) Fix IIS Express Configuration: Your IIS Express configuration file resides in this location: %USERPROFILE%\Documents\IISExpress\config\applicationhost.config

IIS Express Configuration

You need to open this file and fix the following line which corresponds to your Web App. This will enable us to reach this app with computer name, instead of forcing us to use http://localhost

5) That’s it! Just run IIS Express: You need to open a command prompt with Administrator privileges and run the following command

“C:\Program Files (x86)\IIS Express\iisexpress.exe” /site:YourWebAppName

Now go to Safari on OS X and run your test!

Screen Shot 2013-10-27 at 10.19.47 PM

Posted in Uncategorized | Leave a comment

Recording and Playing Audio using AVFoundation Framework

Today at Flatiron School, I implemented a basic Audio Recorder and Player to one of our apps.

Here’s a short tutorial to implement these controls using AVFoundation Framework.

1) Create a Xcode project with a single view.

2) Add “AVFoundation Framework” to your new project.

Adding the Framework

3) Let’s add two buttons to our app and create their respective IBActions and IBOutlets to our ViewController.

Screen Shot 2013-10-24 at 9.08.25 PM

4) Now, in our implementation file, after importing the “AVFoundation” framework, let’s define two instance variables. One for our player, and one for the recorder:

#import "ViewController.h"
#import <AVFoundation/AVFoundation.h>

@interface ViewController ()
{
AVAudioPlayer *myPlayer;
AVAudioRecorder *myRecorder;
}
@end

5) We will now need to prepare the AVAudioSession for recording. We can do this in a new method, called “prepareForRecording”


- (void)viewDidLoad
{
[super viewDidLoad];
[self prepareForRecording];
}

-(void)prepareForRecording
{
NSArray *recordingPathComponents =
[NSArray arrayWithObjects:[NSSearchPathForDirectoriesInDomains
(NSDocumentDirectory, NSUserDomainMask, YES) lastObject],@"My-Recording.m4a",nil];
NSURL *outputFileURL = [NSURL fileURLWithPathComponents:recordingPathComponents];

AVAudioSession *session = [AVAudioSession sharedInstance];
[session setCategory:AVAudioSessionCategoryPlayAndRecord error:nil];

NSMutableDictionary *myRecorderSettings = [[NSMutableDictionary alloc] init];

[myRecorderSettings setValue:[NSNumber numberWithInt:kAudioFormatMPEG4AAC] forKey:AVFormatIDKey];
[myRecorderSettings setValue:[NSNumber numberWithFloat:44100.0] forKey:AVSampleRateKey];
[myRecorderSettings setValue:[NSNumber numberWithInt: 2] forKey:AVNumberOfChannelsKey];

myRecorder = [[AVAudioRecorder alloc] initWithURL:outputFileURL settings:myRecorderSettings error:NULL];
myRecorder.meteringEnabled = YES;
[myRecorder prepareToRecord];
}

6) Here, we create a path to a audio file in our documents directory. Then we prepare the AVAudioSession object that iOS provides to us. Finally we set up our recorder with our preferred settings. We are now ready to do some recording! Let’s implement our Record button action:

-(void)recordPressed:(id)sender
{
if (!myRecorder.recording) {
AVAudioSession *session = [AVAudioSession sharedInstance];
[session setActive:YES error:nil];
[myRecorder record];
} else {
[myRecorder stop];
}
}

6) We’re basically checking to see if we’re already recording. If not, we start recording. If we’re already in the middle of recording, we stop the recording process. So we can use the same button to record/stop depending on our state. Finally, let’s play back our recording:

- (IBAction)playPressed:(id)sender {
myPlayer = [[AVAudioPlayer alloc] initWithContentsOfURL:myRecorder.url error:nil];

[myPlayer play];
}

6) That’s it! For more information about the AVFoundation framework, please visit Apple’s documentation:
https://developer.apple.com/library/ios/DOCUMENTATION/AVFoundation/Reference/AVFoundationFramework/_index.html


Posted in Uncategorized | Leave a comment

Creating Custom Map Annotations using MKAnnotation Protocol

This week at Flatiron School, we learned how to create custom UIMapView annotations using the MKAnnotation protocol. Even though at first I found it to be more complicated than it should be, it started to make more sense after I used it a few times.

Let’s build a single view application that shows our custom MKAnnotation object on a map.

On Xcode, let’s create a new Single View application:

01

Since we’ll be using Map Kit methods and objects, we should add the Map Kit framework to our project.

02

Onto our main View, let’s drag and drop a Map View and check its “Shows User Location” behavior:

03

If we run our application now, this is what we get:

04

Let’s zoom to our location. Not that hard. We need to create an outlet to our Map first. Just Control-drag your map to the ViewController.h file and create an IBOutlet. Let’s name our outlet mapView:

05

Don’t forget to import  <MapKit/MapKit.h> in your header file. Now we’re ready to zoom. We will need to implement the Map View’s didUpdateUserLocation method. In order for the Map View to call this method once it finds the user’s location, we need to set its delegate property to our ViewController.

06

Now let’s run the application again:

07

Much better. Now that we’re done with our basic set up. Let’s create a custom annotation for Bryant Park. For this, we’ll need to create a new NSObject class which adheres to the MKAnnotation delegate. Let’s go ahead and create this class, called “MyCustomAnnotation” and set its protocol:

08

09

The MKAnnotation protocol asks us to create two properties: an title property which is an NSString, and a coordinate property which is a CLLocationCoordinate2D. We also need to create a new initializer as well as a method which will return an instance of MKAnnotationView: 

10

title is the text that is displayed inside the Callout box which is shown once you tap on a pin. coordinate is the 2D coordinate of the pin. Let’s go ahead and implement our initializer and our  MKAnnotationView method.

final-2

We’re basically returning a MKAnnotationView object that has a custom image (park_icon) and it is able to show a Callout dialogue. It will also have an Detail Disclosure accessory on its right side.

Let’s go ahead and add our custom MKAnnotationView to our map. Let’s not forget to import MyCustomAnnotation.h to our ViewController.m file. We will need to add an annotation to our map, and we’ll also need to implement the viewForAnnotation method of the MapView protocol to set our annotation’s view to our newly built method.

final-1

We’re asking the mapView if there are any unused MyCustomAnimation annotations that we can re-use (this is to prevent creating unnecessary annotations — we only need what we see on our screen.) Then we set it to our annotationView method which we built into our MyCustomAnnotation object.

We’re done! Let’s see what our app looks like now:

final

That’s it! Not that bad, is it?

Posted in Uncategorized | Tagged , | 8 Comments